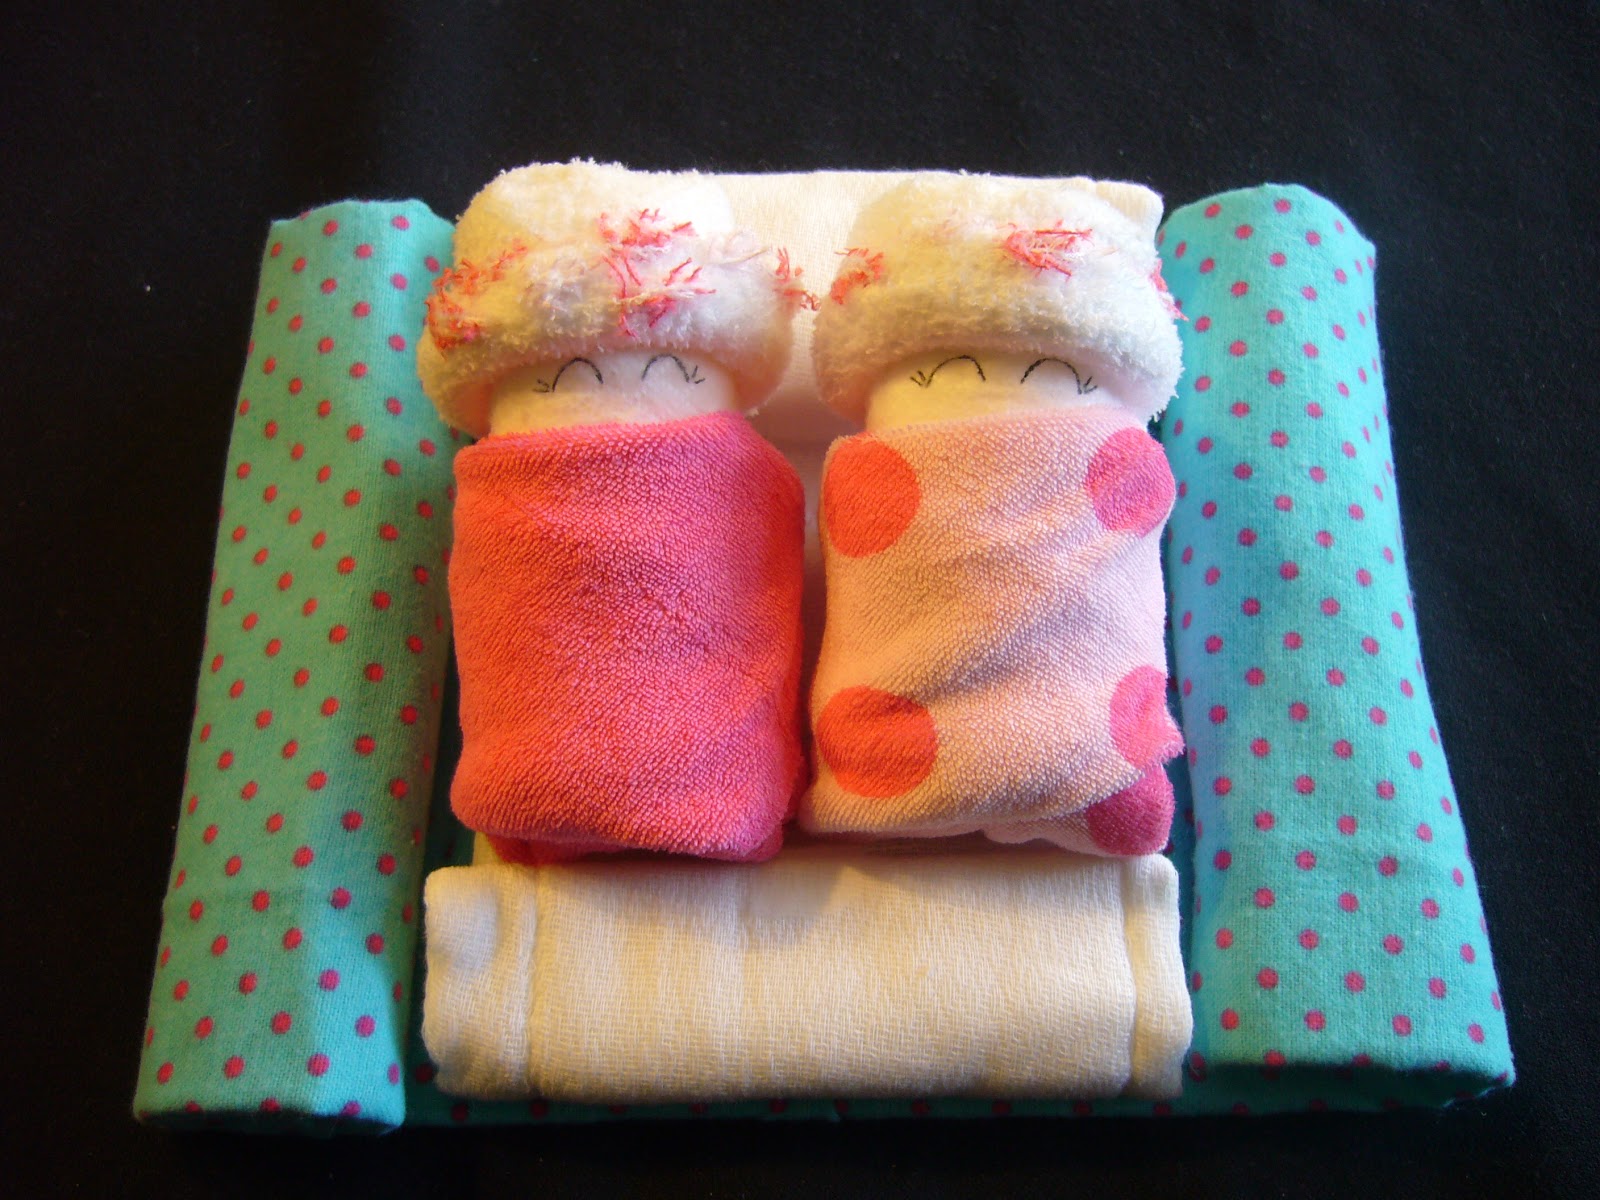
I have discovered one thing with a ten month old crawling around - timetables can really get thrown off. I know I said that I was going to post this tutorial yesterday, but alas, it took one day longer.
But who could resist this?
And yes, the hubby is adorable too. :)
Anyway, without further adieu, here's the tutorial! (And it's my first one!)
SLEEPING DIAPER BABIES
MATERIALS
(This is for a pair of diaper babies and their bed)
1 pair newborn (or 0-3) size socks
2 size 1 diapers
2 baby washcloths
1 cloth diaper
1 receiving blanket
2 long straight pins (make sure they are long. The short ones won't work)
DIAPER BABIES:
(make 2)
First take the diaper and roll it up along the short length. Secure with a straight pin.
Take the washcloth and fold it into a triangle shape, not quite meeting the edge.
Place the rolled up diaper on the washcloth, making sure the side with the pin is at the back.
Now the fun part - swaddle the diaper! Fold the right side over and tuck around the diaper. Fold the bottom up, folding the point down slightly to hide it if you need to. Then take the left side, wrap it around, and tuck the end around the diaper's right "shoulder" (see the second picture).
Take one of the socks and roll it about 3/4 of the way up. Put it one the top of the diaper to make the hat. At this point, draw cute eyes any way you want. (I did sleeping ones). If you want, you can even get googly-eyes and glue then on - they are pretty cute too.
Repeat for the second baby. For a fun variation, you could do one with sleeping eyes and one with googly-eyes. :)
Now, take the receiving blanket and fold it in half.
Then fold it in half again. (I did a little under half and then folded the lip because it needed to fit into the box I had.) Use take to secure the edge if needed.
Here is the box that I used. I found it at a local paper store - it's actually a cupcake box, just without the liner to hold the cupcakes.
Now roll the two edged towards each other. You'll want to leave a good amount of space between the sides at the moment.
Take the cloth diaper and fold it lengthwise into thirds. Roll the top down about three times to make a pillow and the bottom up one time to make the foot of the bed. Again, how much you roll will depend on if you have a box or container you are putting it in and how wide the receiving blanket ended up (top to bottom width). You want to make sure that the pillow side is fairly larger than the foot side. You may need to secure the rolled parts with a bit of tape if they keep wanting to unroll (I did - you can just barely see the piece of tape on the bottom. It doesn't matter if it pulls a bit since the diaper babies will hold it down and hide the tape.)
Put the cloth diaper between the rolled sides of the receiving blanket. Roll the sides in so the blanket is snug around the cloth diaper. (You can see the tape on the cloth diaper better here)
Now, place the diaper babies on top of the cloth diaper, heads on the pillow and bottoms snug against the foot of the "bed".
Since I didn't want everything falling around the box when it was moved, I took a piece of white tulle and tied it around both the babies and the bed - no rolling around for these little ones! If you don't want to use white, you can use whatever color you want!
Then put babies and bed into their box (or whatever package they are going into - I have thought about wrapping them up in cellophane and tying a bow with ribbon in the colors of the baby-to-be's nursery).
Lastly, you can make a label (my Cricut Imagine was feeling quite loved after this project) and attach it using a sticker, or whatever you want. Aren't they cute? Snug as two bugs in a rug!
Well, there you have it! Sleeping Diaper Babies complete with a bed! You will be the hit of the baby shower for having such a clever gift!
If you want a pair of Sleeping Diaper Babies and don't feel like making them yourselves, you can to to my Etsy store and pick one up! http://www.etsy.com/shop/TinyFingersandToes?section_id=12043766There are both boy and girl ones.


No comments:
Post a Comment